How to Sand and Finish Floors


Hardwood Floor Sanding and Refinishing
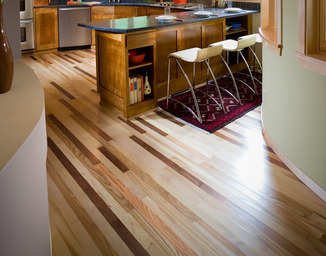
Hardwood floor sanding and hardwood floor refinishing have many different purposes. One important aspect of hardwood floor sanding and refinishing is restoration work. For floors that have seen some better days and have moderate to severe scratches (scratches that have affected the actual wood), can look brand new again after a hardwood floor sanding and refinishing job. You will also need to sand and refinish hardwood floors if you want to change the look of your floor, applying a different color stain to the floor or giving it a different finish.
A job of this scale is usually done by a professional contractor, but more and more people consider doing this project themselves. Learning more about hardwood floor sanding and refinishing will give you a better idea about which path you’d like to take.
Tools Needed
A hardwood floor sanding and refinishing project deals with multiple professional-level tools that are available at your local hardware rental shop. Here are the most essential tools for the job:
• Multiple sanders (for rough sanding, fine sanding and edging)
• Basic maintenance tools (broom, vacuum, mop)
• Stains and finishes
• Protective gear (dust masks, ear plugs, eyewear)
Room Prep
Before you start sanding down your floors, the room must be prepared accordingly to deal with the amount of dust created when you sand. Be sure to prep the following areas for a smoother overall experience.
• Clear the Room. Remove all furniture and belongings in the room. Anything left in the room will be covered in dust.
• Remove Base Shoe. If your room has any molding on the bottom of the baseboards, remove them. They can get damaged in the sanding process.
• Seal the Room. Any windows or duct work should be sealed with tape and plastic. If you have any hanging light fixtures, cover with a plastic bag and seal with tape.
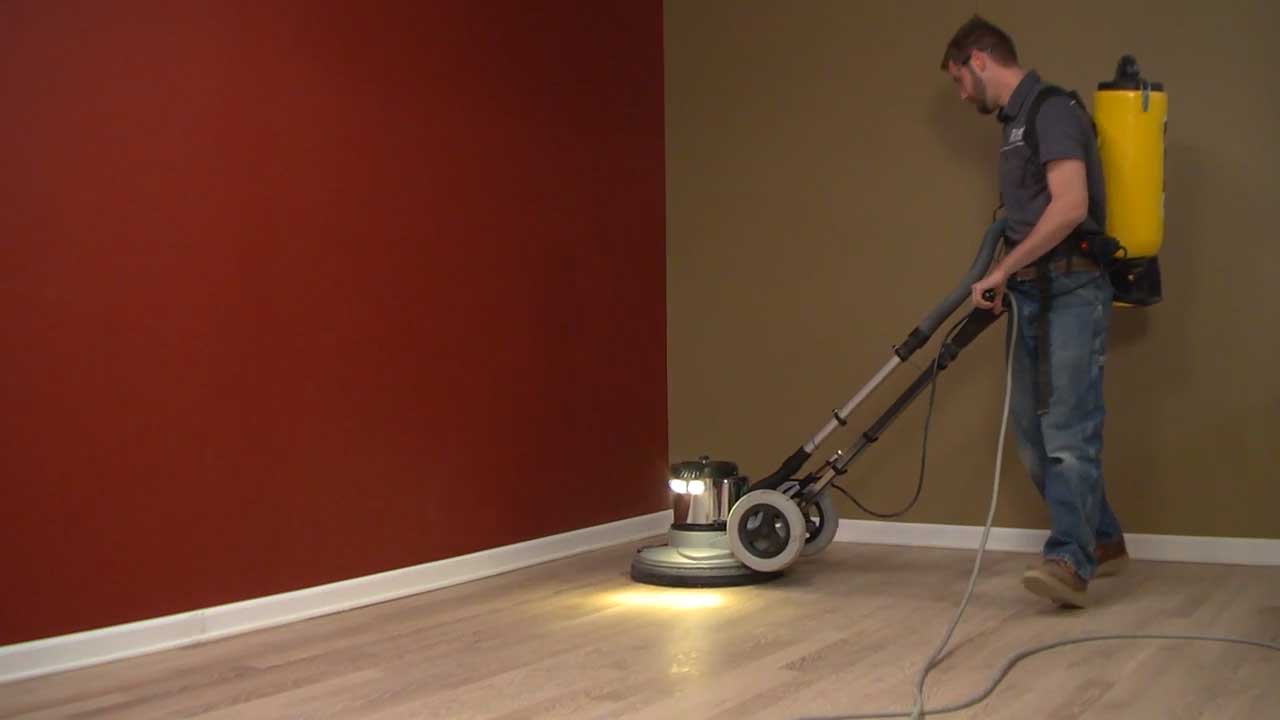
Sanding the Floor
The hardwood floor sanding process consists of multiple stages of sanding with sandpaper of varying roughness.
• Rough sanding. A floor drum sander is used to start the initial removal of the existing floor finish.
• Fine sanding. Use a finer grit sandpaper to smooth out the work in the previous rough sanding. A drum sander can still be used or other sanding equipment (like a vibrating sander) can be rented.
• Edge sanding. An edge sander will be used to sand areas that a larger sander can’t access, such as near walls.
• Replacing pads. Don’t be stingy when it comes to using sandpaper. Change your pads as often as needed to ensure uniform work.
• Cleaning dust. Between each sanding, be sure to thoroughly clean and remove the dust on the floors. After you do your rough sanding and rough edging, clean. The same thing applies when you do your fine sanding. Having dust when you sand and finish hardwood floors will have a negative effect on the overall project.
Applying the Finish
Not as labor-intensive as sanding, hardwood floor refinishing still requires a great amount of patience and attention to detail to get the job done right.
• Clean the space. Dust, vacuum and mop the entire room to remove as much dust as possible. Refinishing a hardwood floor with dust in the room is a recipe for disaster.
• Stain the floor (optional). Now that the bare wood is exposed, now is the time to make any repairs or alter the color of your floor with a stain. Use multiple coats of stain as needed.
• Apply the finish. When you’re ready to seal the floor and apply a finish, be sure to read all manufacturer’s instructions and apply additional coats as needed.
Other Considerations
If you’re still unsure about how you want to tackle how to restore your hardwood floors, be sure to think about more than just saving money. A DIY project can is always more cost-efficient—if you’re comfortable with your skills.
• Cost vs. Time. While going the DIY route is cheaper, it usually takes longer than when a professional contractor does the job.
• Tag Team with a Pro. If you still want to save some money, consider hiring a contractor for sanding the floor only. Staining and refinishing hardwood floors are easier to do than sanding. Consider a professional to the heavy work and finish the job yourself.
• The Bona Advantage. A Bona Certified Craftsman is a professional contractor specializing in the Bona Floor Care System.
Bona features dust-free sanding and finishing with many exceptional benefits:
o Bona’s Dust-Free Sanding virtually eliminates airborne dust, which minimizes clean-up headaches and reduces airborne particulates that can be harmful to your health
o No dust trapped in air vents or permeating your home or plastic hanging in your home = no timely clean-up
o GREENGUARD certified for indoor air quality. Finish doesn’t produce harmful fumes - so no need to vacate your home or business
If you’re interested in seeing how a Bona Certified Contractor can make your floors beautiful, contact a contractor today.
News
Holiday Cleaning on the Go with Bona
Get ready for the holidays faster with Bona.

News
Greening Up Your Holidays
Small acts can make a big impact on creating a greener world.
News
Halloween Holiday Cleaning Tips
Don’t let a messy home scare your guests from enjoying your Halloween party.